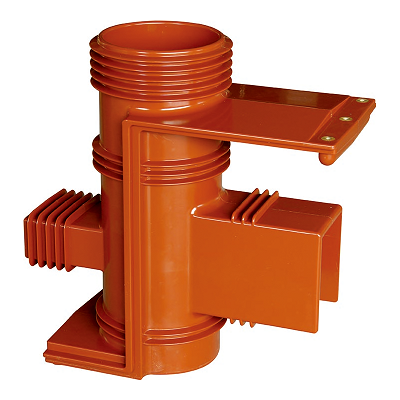
How to Install an Epoxy Resin Contact Box Safely
If you're working with electrical connections, you know how crucial it is to protect them from moisture, dust, and corrosion. That’s where an Epoxy Resin Contact Box comes in—a durable, waterproof solution that ensures long-term reliability. But how do you install one correctly to maximize safety and performance?
With over 20 years of experience in electrical components, I’ve seen firsthand how improper installation can lead to failures. In this guide, I’ll walk you through the safest way to install an Epoxy Resin Contact Box while highlighting key features of Timetric’s high-quality models.

What Tools Do You Need for Installing an Epoxy Resin Contact Box?
Before starting, gather these essentials:
-
Wire strippers – For clean wire preparation
-
Heat gun (optional) – Helps with resin curing
-
Screwdriver set – For securing terminals
-
Safety gloves & goggles – Protection against resin and electrical hazards
-
Multimeter – To test connections post-installation
What Are the Key Features of a High-Quality Epoxy Resin Contact Box?
At Timetric, we engineer our Epoxy Resin Contact Boxes for maximum durability. Here’s what sets them apart:
Technical Specifications
| Feature | Timetric Epoxy Resin Contact Box |
|---|---|
| Material | High-grade epoxy resin |
| IP Rating | IP68 (Fully waterproof & dustproof) |
| Temperature Range | -40°C to +120°C |
| Voltage Rating | Up to 1000V |
| Terminal Type | Screw or push-in connectors |
| Certifications | UL, CE, RoHS compliant |
Why Choose an Epoxy Resin Contact Box Over Plastic?
✔ Superior insulation – Prevents short circuits
✔ Corrosion-resistant – Ideal for harsh environments
✔ Long lifespan – No degradation from UV or chemicals
How to Install an Epoxy Resin Contact Box Step by Step?
Step 1: Prepare the Wires
-
Strip the wires to the recommended length (check product manual).
-
Ensure no frayed strands to prevent poor connections.
Step 2: Insert Wires into the Terminal Blocks
-
Loosen the terminal screws, insert the wires, and tighten securely.
-
Avoid over-tightening to prevent damage.
Step 3: Pour the Epoxy Resin
-
Mix the resin (if required) and pour evenly to encase the connections.
-
Ensure full coverage to block moisture and air.
Step 4: Allow Proper Curing Time
-
Let the resin set (usually 24 hours for full hardness).
-
Use a heat gun at low settings to speed up curing if needed.
Step 5: Test the Connections
-
Use a multimeter to verify continuity and insulation resistance.
-
Check for any loose wires before sealing completely.
What Common Mistakes Should You Avoid?
-
Skipping resin mixing – Improper ratios weaken protection.
-
Insufficient curing time – Leads to weak encapsulation.
-
Overfilling the box – Can cause spillage and messy installations.
Why Trust Timetric for Your Epoxy Resin Contact Box Needs?
At Timetric, we’ve spent years refining our Epoxy Resin Contact Boxes to meet industrial demands. Whether you’re in construction, marine, or underground electrical work, our products ensure reliability, safety, and longevity.
Need a Durable Epoxy Resin Contact Box? Contact Us Today!
If you’re looking for a high-performance Epoxy Resin Contact Box, Timetric has the right solution. Our experts can help you choose the best model for your project.
Contact Timetric Epoxy Resin Contact Box today!


